Cubit 16.04 User Documentation
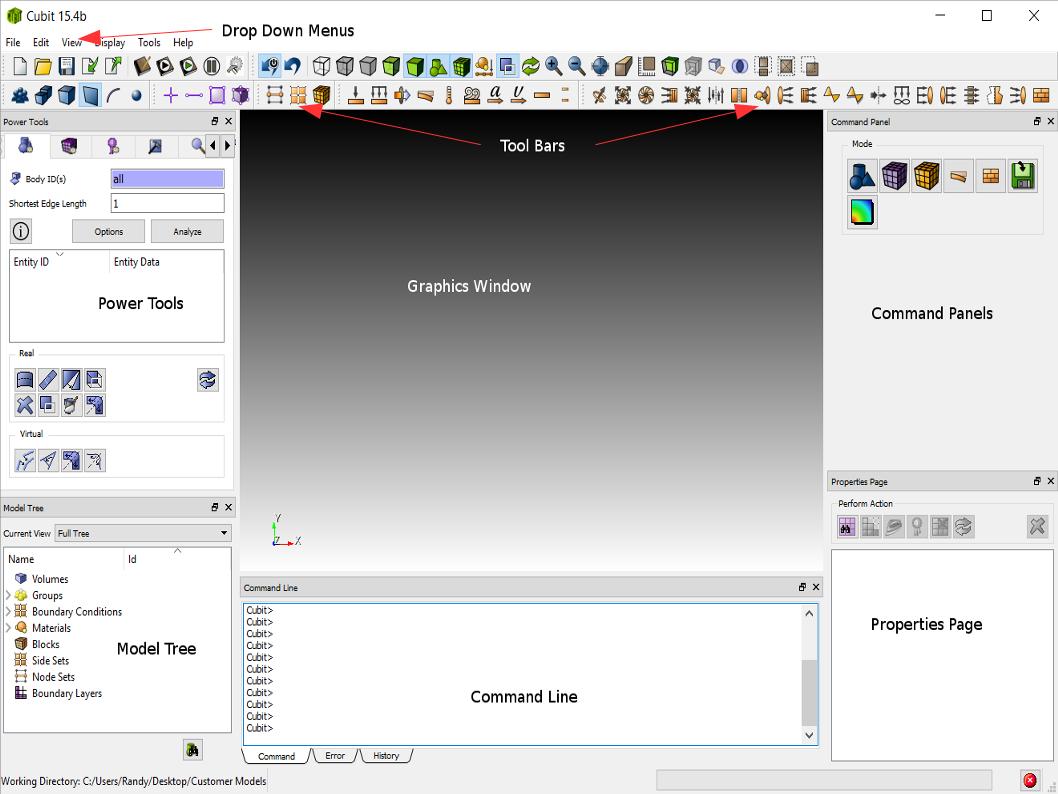
The default CUBIT Application Window is shown in the following image.
Figure 1. The CUBIT Application Window
Graphics Window- The current model will be displayed here. Graphical picking and view transformations are done here.
Power Tools - Geometry tree hierarchy view, geometry analysis and repair tool, meshing tool, meshing quality tool, and ITEM Wizard.
Property Editor - The Property Editor lists attributes of the current entity selection. Some of these properties can be edited from the window.
Command Panel - Most Cubit commands are available through the command panels. The panels are arranged topologically, by mode.
Command Line Workspace - The command line workspace contains both the cubit command and error windows. The command window is used to enter cubit commands and view the output. The error window is used to view cubit errors.
Drop Down Menus - Standard file operations, Cubit setup and defaults, display modes, and other functionality is available in the pull-down menus.
Toolbars - The most commonly used features are available by clicking toolbar icons.
The Graphical User Interface has a context-sensitive help system. To obtain help using a specific window or control panel, press F1 when the focus is in the desired window. It may be necessary to click inside a text box to switch focus to a particular window. If no context specific help is available, it will open the cubit help documentation where you can search for a particular topic.
All windows in the CUBIT Application can be Floated or Docked. In the default configuration, all windows are docked. When a window is docked the user can click on the area indicated below.
Figure 2. A docked window. Click and drag to float.
By dragging with the left mouse button held down, the window will be un-docked from the Application Window. Dragging the window to another location on the Application Window and releasing the mouse button will cause it to dock again in a new location. The bounding box of the window will automatically change to fit the dimensions of the window as it is dragged. Releasing the mouse button while the window is not near an edge will cause the window to Float. To stop the window from automatically docking, hold the CONTROL key down while dragging.
Figure 3. A Floating Window
When a window is floating, as shown in Figure 3, it is possible to dock it by clicking the title bar of the window and dragging it to its new docked location.
Note: Double clicking on the title bar of an floating window will cause the window to redock in its last docked position.