ITEM Tutorial Step 8
Step 8: Define Boundary Conditions
Exodus boundary conditions are specified as generic blocks, nodesets,
and sidesets. Clicking on a boundary condition type on the ITEM panel
will open the corresponding command panel.
- Click on Define boundary conditions on the ITEM
panel
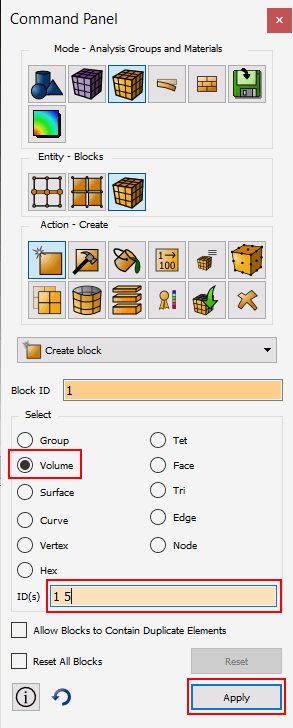
- Click on Define Block. This opens the Material
Properties->Block Panel and automatically assigns a default block
id of 1.
- Set selection type to Volume
- Select Volumes 1 5
- Click Apply
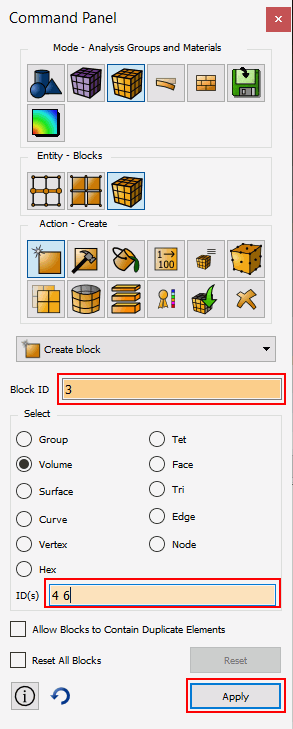
- Click on Define Block on the ITEM Panel. It should
automatically increment the Block ID for you.
- Select Volume 3
- Click Apply

- Click Create Block on the ITEM Panel to increment
block ID
- Select Volumes 4 6
- Click Apply
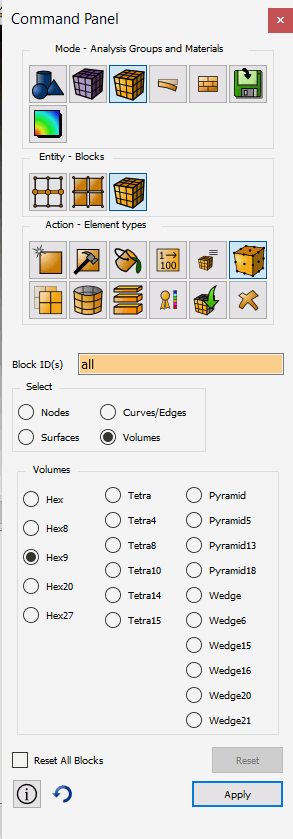
- Change to the Element Type panel by selecting
the element type button
- Change the Element Type to Hex9
- Click Apply
- On the ITEM panel click Done